Header
Header Style


Lava currently offer 4 header styles, follow the steps below to change your header style.
- Go to Appearance > Customize > Header section
- Select your header style under Header Style
- Click Save button
Logo & Favicon
To be retina friendly, 2 versions of logo is needed. First the normal size and the second exactly double the height and width of the normal one.
Small Logo – an alternative logo used on mobile screen or when the header is in sticky state. If small logo is not set, main logo will be used instead.
How to Upload A Logo
- Go to Appearance > Customize > Site Identity section
- Upload your logo under Logo
- Upload your Retina logo (2x size) under Retina Logo
- Upload your Nav/Mobile logo under Small Logo
- Upload your Nav/Mobile Retina logo (2x size) under Small Retina Logo
- Click Save button
How to Upload A Favicon
- Go to Appearance > Customize > Site Identity section
- Upload your favicon under Site Icon
- Click Save button
Navigation / Menu Setup
Lava theme uses standard WordPress menu system for navigation. To setup your menu, go to Appearance > Menus page.
There are 4 theme locations to assign your menus:
- Main Menu – navigation menu for header style 1
- Fullscreen Menu – navigation menu for header style 2 and header style 1 on small screen
How To Setup A New Menu
- Go to Appearance > Menus page.
- Click the Create A New Menu link to make a new menu. Enter the name then click the Create Menu button.
- To add a menu item, select one of your created pages on the left hand side and click the Add to Menu button. You can also add all kinds of different posts from the left side.
- To add a custom menu item, enter a custom name and link into the Links.
- Manage your menus by using the drag and drop functionality. To create a dropdown menu, simply drag a menu item below and slightly to the right of another menu item, and it will lock into place and create a dropdown section.
- After setting up your menu, scroll down to the bottom of the page to assign the menu to one of the 2 locations in the Theme Locations box.
- Once its all done, make sure you click the Save button.

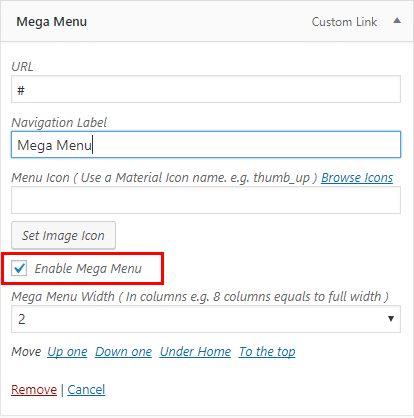
How To Setup A Mega Menu
- Add your menu items to the menu and arrange them in 3 levels. See the screenshot below.
- On the first level menu item, check Enable Mega Menu option.
- Set Mega Menu Width in columns, each columns equals 220px in width. For full width menu simply select 8 columns.
- On the second level, set Column Width relative to the menu width. e.g. 1/2 is the same as 50% of menu width.
- Second level menu items also act as the column titles, hide the title by checking the Hide Text option.
- Third level is where you put most of your mega menu items.
- Alternatively you could also assign a Widget Area to a menu item, so it can display widget content as drop down.
- Once its all done, make sure you click the Save button.

Enable Mega Menu
Add Menu Icon to Menu Item
You could either use icon font or an image as menu icon.
- To use an icon font, simply enter the icon name in the Menu Icon field. Here’s a list of icons available for use: Material Icons
- To use an image icon, click on the Set Image Icon button to upload your image.
![]()
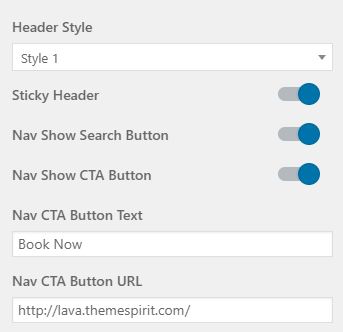
Enable Call To Action (CTA) button & Search button on Navbar
CTA button only show on Header Style 2 and Header Style 4. Both of the buttons can be edited in Appearance > Customize > Header section.